

If you have Successfully Installed Prepar3D but now Prepar3D will Not launch please go through these steps one by one to help resolve this
Click here for the Prepar3D system requirements Note: A Graphics Card with with Full DirectX 11 Support is required
Windows N Version requires the Media feature pack to run Prepar3D, Download and Install the Media Feature Pack
----------------------------------------
INDEX
I) Steps to check and confirm
II) Error messages when launching Prepar3D
---------------
I) Steps to check and confirm
Please go through these steps one by one to help resolve your situation
Launch Prepar3D and test after you each step
A) Windows Update
Fully update your system. This should include running the Windows Update and updating any drivers to the newest version.
---------------
B) Windows Admin
Are you logged onto your windows user account as administrator ? If not log in now as administrator Or Create an administrator user account and then log in
---------------
C) Graphics card
Confirm your dedicated graphics card is set to properly execute Prepar3D. Some PC's and Laptops have dual cards, an on-board Integrated card and a dedicated high performance GTX \ AMD card.
NVIDIA graphics cards: Open the NVIDIA Control Panel, select Manage 3D settings, and set the Preferred graphics processor to High-performance NVIDIA processor. You can also set Prepar3D.exe’s preferred graphics processor directly under the Program Settings tab under Manage 3D settings.
AMD graphics card: Open the AMD Control Panel go to the Switchable Graphics tab, browse and locate the Prepar3D.exe and set it for High Performance and click Apply. Then to Graphics > PowerPlay - Set Plugged In and Battery to Maximum Performance and Click Apply.
Restart your computer when you have applied the changes.
---------------
D) Antivirus Software
Disable any Antivirus Software you may, Then launch Prepar3D and test, If successful Insure you add the complete core Prepar3D folder to the Exclusions Zone. This will stop any of the Prepar3D files been detected as False Positives.
Also Disable the UAC User Account Control
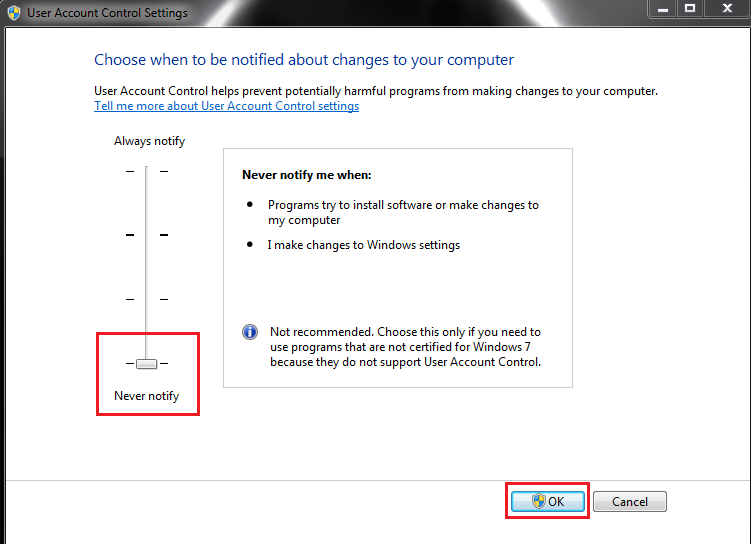
Windows Defender: If you are using Windows Defender Turn Off "Real Time Protection" and "Controlled folder access" and then launch Prepar3D and test, If successful make sure you add the complete core Prepar3D folder to the Exclusions Zone of Windows Defender Like This
You can also add an Exclusion for "Controlled folder access" OR just turn this Option Off
---------------
E) Administrator
Launch Prepar3D as administrator
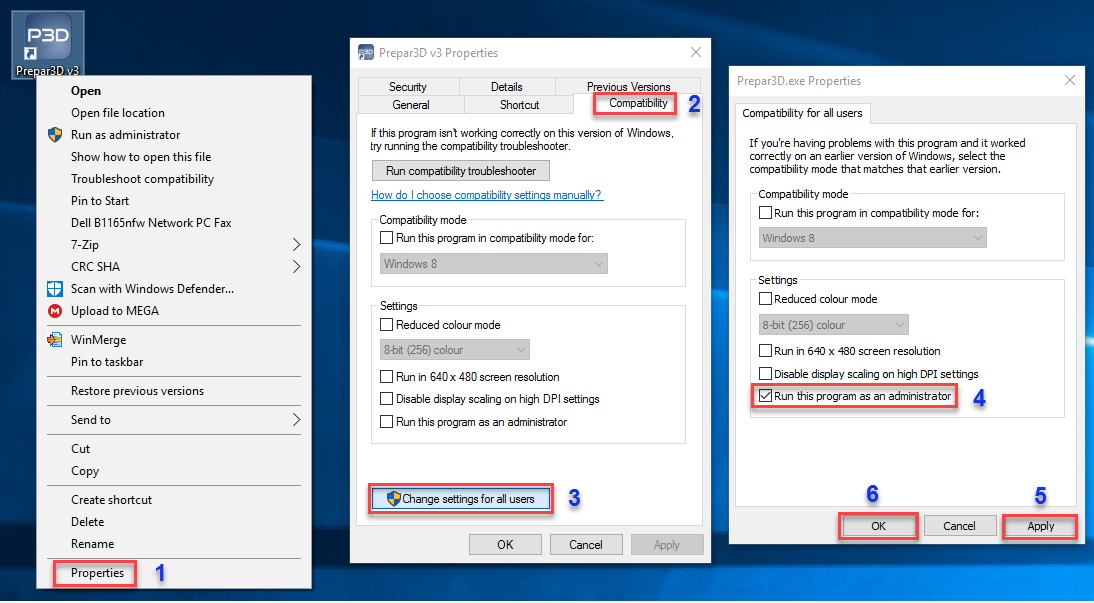
Navigate to your Prepar3D core folder right click on the Prepar3D.exe and run as administrator
If successful you can then set up Prepar3D to run as administrator Like This
---------------
F) Delete Generated files
Remove the Prepar3D generated folders that is generated during the program execution
These folders and files will generate again when Prepar3D is launched next
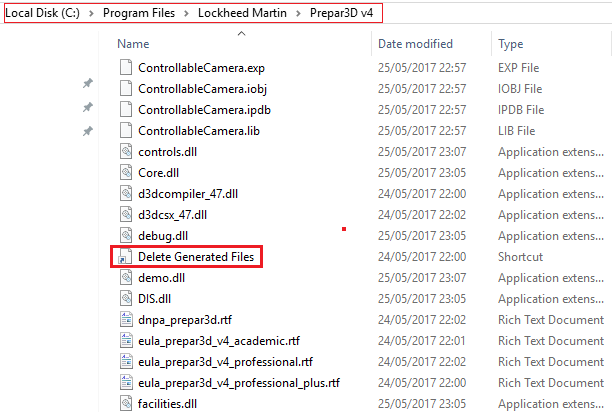
Prepar3D v4
Navigate to your core Prepar3D v4 folder, Scroll down a bit, Double left Click on the file Delete Generated files, A small black window will appear and then disappear again, this is normal.
Please see this link for a short video on this process https://youtu.be/YsOibqIV0OQ?t=13s
Next: Navigate to the location below and Click and Move these 2 blue folders out of this location and pop them onto your Desktop.
PC ► Documents ► Prepar3D v4 files \ Prepar3D v4 Add-ons
After this step launch Prepar3D and test again
Please see this link for a short video on this process https://youtu.be/YsOibqIV0OQ?t=52s
-----------
Prepar3D v3
Copy the Tex below one by one and Paste them into your windows search bar and click on the result
Delete all the files and folders in these locations, They will generate again when Prepar3D is launched next
%PROGRAMDATA%\Lockheed Martin\Prepar3D v3
%LOCALAPPDATA%\Lockheed Martin\Prepar3D v3
%APPDATA%\Lockheed Martin\Prepar3D v3
Next: Navigate to this location below and manually delete the 2 blue folders
Documents ► Prepar3D v3 files \ Prepar3D v3 Add-ons
When you have completed this launch Prepar3D and test
---------------
G) USB Devices
Remove all USB Devices Including extra Monitors and USB sounds cards (Except keyboard and mouse) Plug just 1 Monitor back directly into your dedicated GPU and then launch Prepar3D and test. Its possible a recent windows updated or Incompatible driver is causing this Issue
If this step is successful plug each USB device back in one by one and test as you go along
Note: If you have USB Soundcards or FL Studio Installed please see the post below
https://prepar3d.com/forum/viewtopic.ph ... 2&t=130636
---------------
H) Microsoft Visuals
Prepar3D v4: Download and Install Microsoft Visuals 2015 (x64) and (x86)
Insure you first disable your Antivirus Software, Your Firewall and UAC (User Account Control)
1) Download Microsoft Visuals 2015 (x64) and (x86) at the link below
2) Run both Installers as Administrator and restart your computer
https://www.microsoft.com/en-us/downloa ... x?id=52685
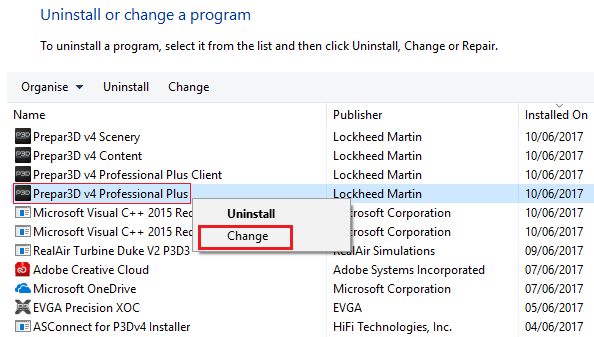
Note: If you already have Visuals 2015 run a Repair in the Control panel, Right click, click Change and click Repair
Prepar3D v3: Download and Install Microsoft Visuals 2013 (x64) and (x86)
Run both Installers as Administrator and restart your computer
https://www.microsoft.com/en-ie/downloa ... x?id=40784
---------------
I) Microsoft .NET Framework
Windows 10: Run the Microsoft .NET Framework Repair Tool Click Here and go through the prompted steps
Windows 7 & 8: Insure you have at least Microsoft .NET Framework 4.6.2 Installed, Run the Installer as administrator and Restart your computer when completed
---------------
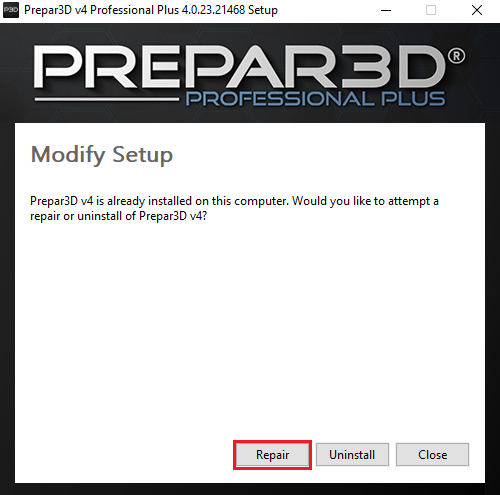
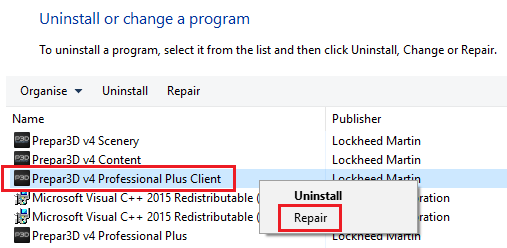
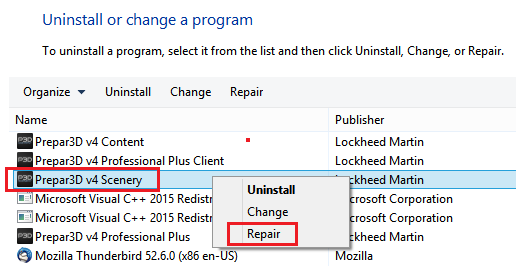
J) Run a Repair on Prepar3D
Run a Repair on your Prepar3D Install
Navigate to the windows Control Panel right click Prepar3D Academic \ Professional and click Change and click Repair
Then Restart your computer
Note: Insure you first disable your Antivirus Software, Your Firewall and the UAC (User Account Control)
---------------
K) Graphics driver
Reinstall or Update your graphics driver.
Insure you Tick the Box for "Perform a clean Installation" when you are prompted the option during the driver Install process
Also you can use a driver cleaning utility like Driver Display Uninstaller to remove your old driver and then proceed to Install the driver again
---------------
L) Windows User Account
To eliminate a corrupt windows user Account........
Temporarily Create another Windows User Account with Admin privileges, Sign into this new account and then launch Prepar3D and test
Note: Don't use Special Characters in your Windows User name
---------------
M) DirectX End-User Runtimes
Download and Install DirectX End-User Runtimes
Before you begin......
Create and Name a new folder anywhere on your PC, For example I created a new folder in my Documents calling it DirectX
Point the Installer to this folder and extract the files here
1) Download DirectX End-User Runtimes (June 2010)
2) Navigate to your downloads and right click on directx_Jun2010_redist.exe and run as administrator
3) Click Yes to the terms and conditions
4) Click Browse and navigate to your new folder, Click ok. The Installer will extract the files here
5) Open your new folder, Scroll down and right click on DXSETUP.EXE and run as administrator
After the Install process has completed Restart your computer
---------------
N) Microsoft Core XML (MSXML) 6.0
Download and Install the prerequisite msxmI6_x86 + x 64msi
More then likely you already have this prerequisite on your computer
---------------
O) Uninstall \ Reinstall Prepar3D
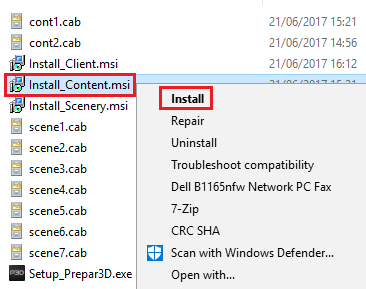
Uninstall Prepar3D and then Reinstall again
Uninstall Prepar3D: Please see This Link for a guide with Images to Uninstall Prepar3D
Reinstall Prepar3D: please see This Link for a guide to Reinstall Prepar3D.
Then launch Prepar3D and test
Note: If you are having problems Installing Prepar3D, Click Here for Troubleshooting steps to take
---------------
P) System File Checker
Run the The System File Checker, Its a utility in Windows that allows users to scan for corruptions in Windows system files and restore corrupted files
For a guide to use this tool Click Here