

A Step by Step Guide to update Lockheed Martin's Prepar3D v4 using the Update Component Installers
This is the Same process as the previous version "v3" with the exception of requiring to activate Prepar3D v3 again after a Client update.
------------
When minor updates are released for Prepar3D v4, there are two options available to update Prepar3D v4. The recommended method is simply updating using the Client installer. This is the quickest and least error prone. When you uninstall the Client, you will be prompted about whether or not you wish to deactivate Prepar3D. You can choose “No” if you are simply updating the same machine and, therefore, will not have to reactivate once the reinstall is finished.
You can also update by doing a complete uninstall and reinstall of the entire application, but often that is not necessary or desired
Note: You must have already installed the full Prepar3D v4 application in order to update just the client
----------------------------------
We have 3 Component Installers, Client, Content and Scenery
The Client component is all that is Required to update Prepar3D v4 to a more recent version
The Content and Scenery component's are Optional update's each of which may have additional changes with minor update's.
------
Update Link August 2018 For a Video tutorial on this process see this link https://youtu.be/rTvuZi0NpAk
------
INDEX
1) Updating Prepar3D v4 to a more recent version (Client update)
2) Confirming the Client update was successful
3) Actions to take after you update the Client (Optional)
4) 3rd Party Software (Add On's) after a Client update
-----
5) Updating the Content component
6) Updating the Scenery component
7) Additional Information
Please Note: Insure you temporarily Disable your Antivirus Software and the User Account Control (UAC) before you begin the updating process
-----------------------------------------------------------------
1) Updating Prepar3D v4 to a more recent version (Client update)
Note: You must Uninstall the existing Client first before you Install the new Client
To uninstall the existing Client..........
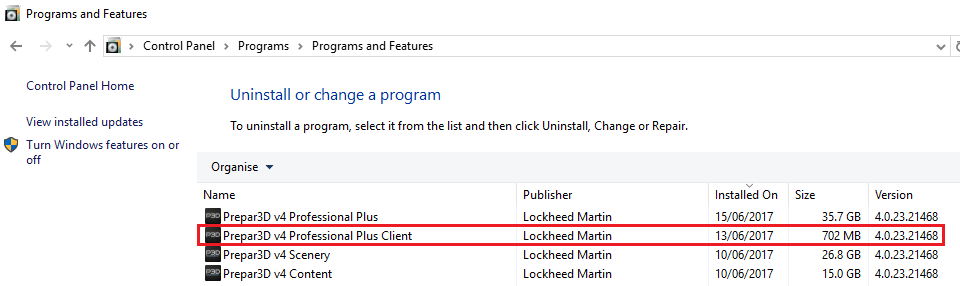
Navigate to your Control Panel, Right Click on Prepar3D v4 Academic \ Professional Client, Click Uninstall
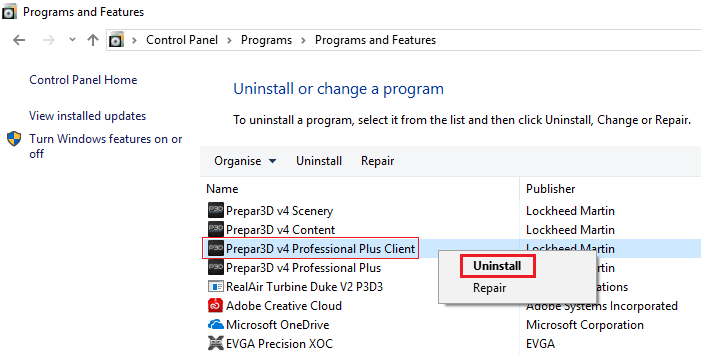
The Programs and Features box will appear, Click Yes to Uninstall the Client
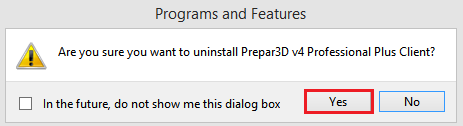
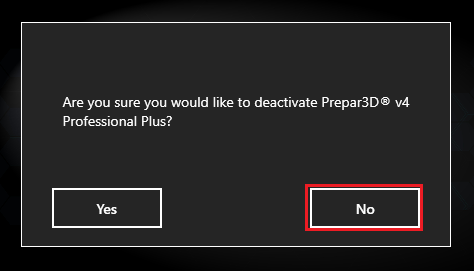
You will now be given an option to "deactivate Prepar3D v4 or not "
If you are simply updating the Client, You can choose “No” Your Prepar3D license will stay active, therefore you will not have to reactivate once the update is finished.
Next, Sign into your Prepar3D Purchased Downloads fill out the Customer Account Information with your Email address and Account Password
Click the little + to expand the Component Installers.
The Client is a stand alone Installer, Click on Install_Client.msi to Download this file.
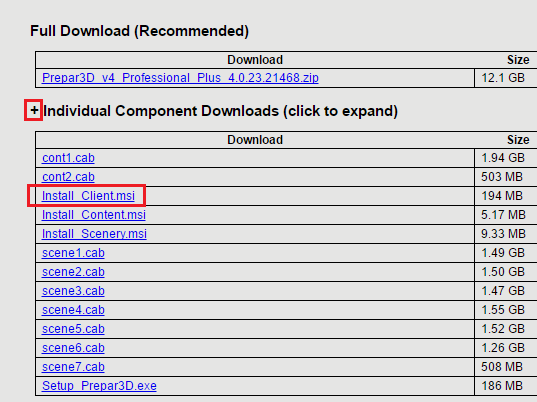
After the download has completed, Navigate to your PC Downloads
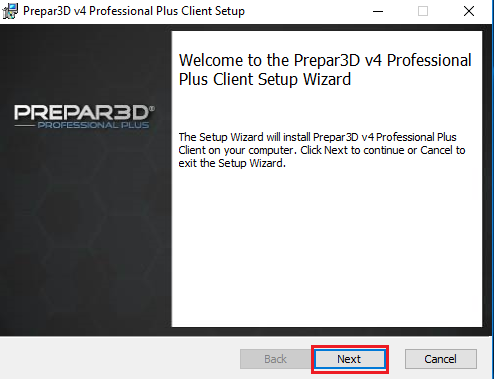
Right Click on the new Install_Client.msi Click Install

Go through the prompted steps to Install the new Client
-----------------------------------------------------------------
2) Confirming the Client update was successful
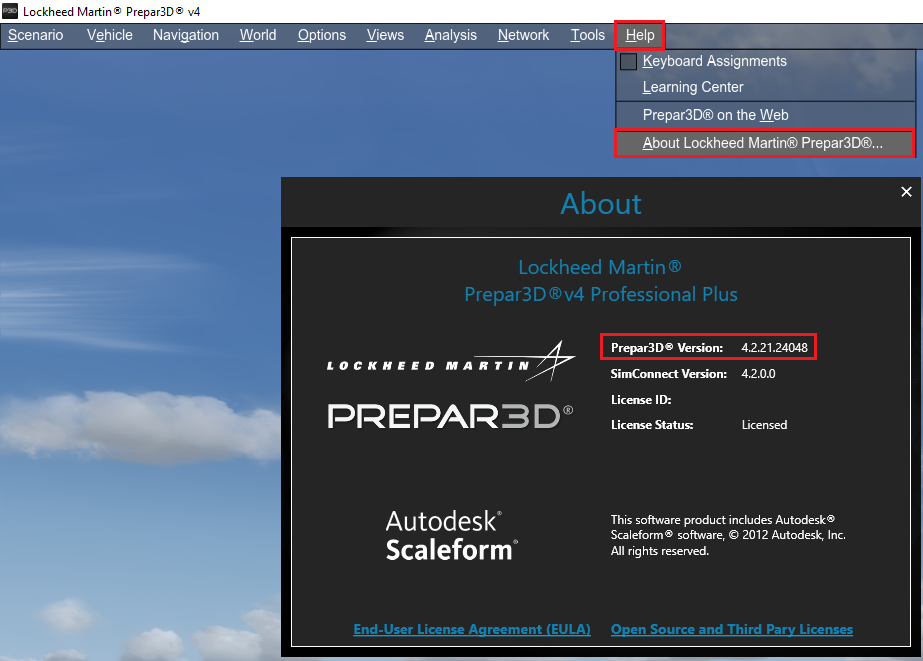
You can confirm a successful Client update by Launching Prepar3D v4
Click Help > About Lockheed Martin, Here you can confirm you have the most recent version of Prepar3D v4
By completing a Client update you have now updated Prepar3D v4 to a more recent version
You can also check and confirm the Client version number in your Control Panel
-----------------------------------------------------------------
3) Actions to take after you update the Client (Optional)
These actions are recommended But not required
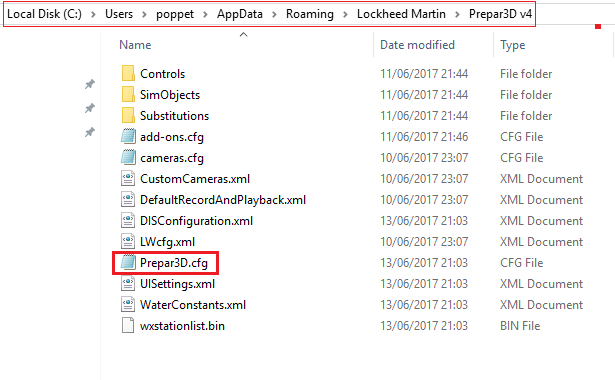
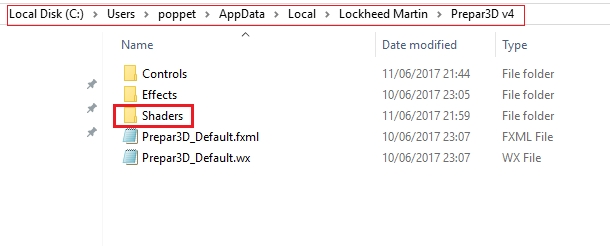
Delete the Prepar3D.cfg file and the Shaders folder after you update with the Client
Note: This file and folder will generated again when you launch Prepar3D
These actions will not effect your 3rd Party Software (Add On's), You will need to readjust your graphic and scenery settings to your preference again via Prepar3D > Options after you delete the Prepar3D.cfg file
Right click and delete the Prepar3D.cfg file and the Shaders folder, These will generate again when you launch Prepar3D
-----------
Local Disk (C:) ► Users ► You ► AppData ► Roaming ► Lockheed Martin ► Prepar3D v4 - Prepar3D.cfg
Local Disk (C:) ► Users ► You ► AppData ► Local ► Lockheed Martin ► Prepar3D v4 - Shaders
-----------
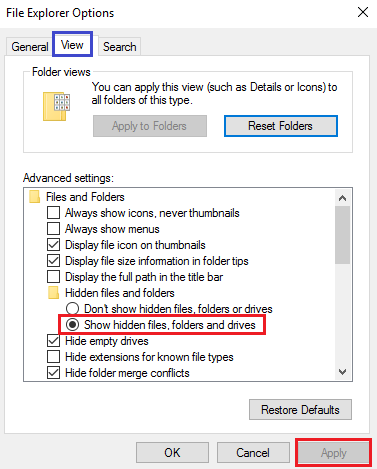
To locate this file and folder, Insure the box is Ticked for Show hidden files, folders and drives in File Explorer Options
-----------------------------------------------------------------
4) 3rd Party Software (Add On's) after a Client update
Completing a Client Update will mostly effect Utilities like Active Sky Next, Active Sky 2016, FSUIPC, Flight1 GTN 750\650, SODE, Chaseplane and EZdok Just to name a few.
In most cases Software Developers will be releasing Updates to there Programs\Utilities to coincide with the release of a new Client update
Check the support forums for the "Add On" in question for news and updates
-----------------------------------------------------------------
-----------------------------------------------------------------
5) Updating the Content component
Note: Both the Content and Scenery component's are Optional Updates
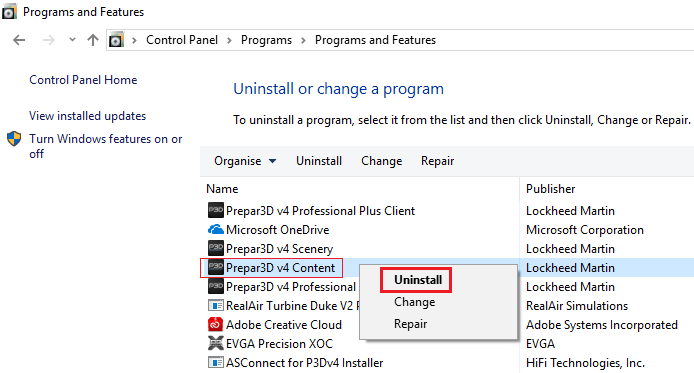
You must Uninstall the existing Content component first before you Install the new Content
To uninstall the existing Content......
Navigate to your Control panel, Right Click on Prepar3D v4 Content, Click Uninstall
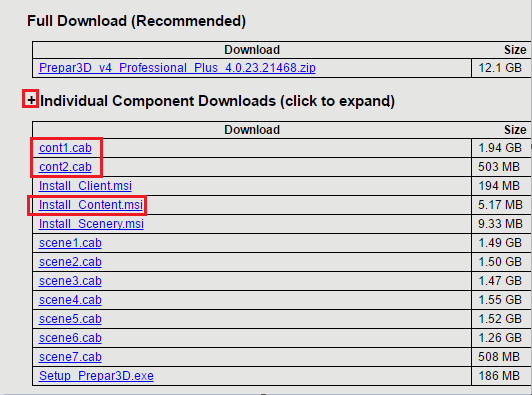
The Content component files are bigger in size (2.5 gig)
A Download Manager is Recommended to aid in a successful download
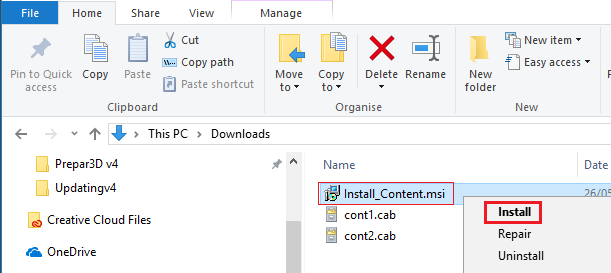
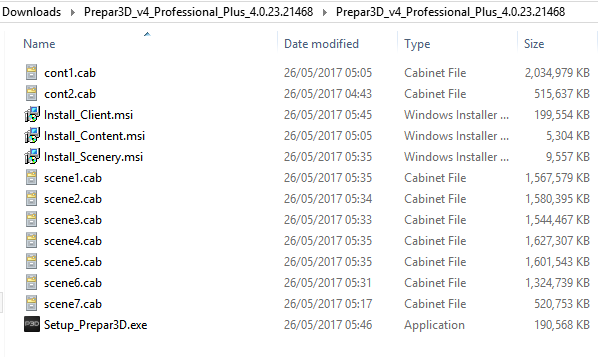
The following 3 files outlined in red are required to run the Content update.
Click on each of the files to download, Cont1.cab, Cont2.cab, Install_Content.msi
After the download has completed, Navigate to your PC Downloads
Insure all 3 files are in the same folder (location)
Right Click on Install_Content.msi Click Install, Go through the prompted steps to Install the new Content update
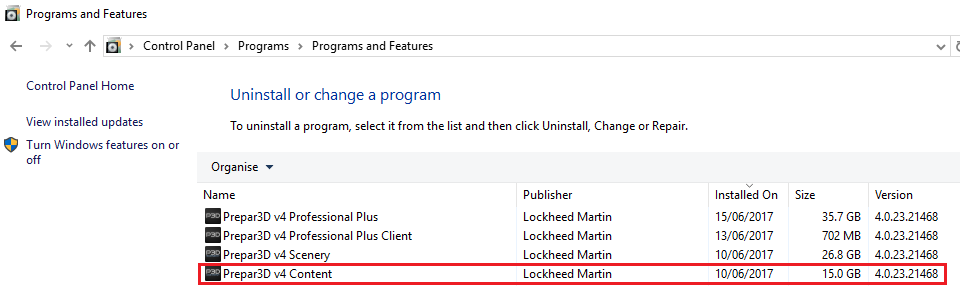
You can confirm a successful Content update by checking the Content version number in your Control Panel
Note: Completing a Content Update will possible overwrite files like effects, Simobjects, sounds and textures that have been Modified by 3rd Party Software (Add On's)
For any questions you may have regarding a Content update please visit your 3rd party software support Forums
-----------------------------------------------------------------
6) Updating the Scenery component
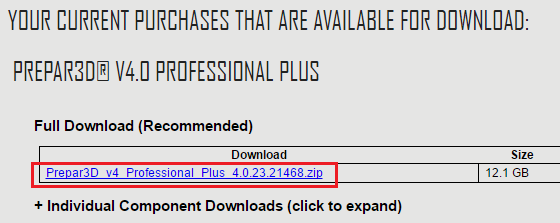
Due to the size of the Scenery files, If you would also like to update the Scenery component as well as the Client and Content it is highly recommended to download the complete Prepar3D v4 file to your computer and then complete the updating process
Use a Download Manager to download the complete Prepar3D v4 file to aid in a successful download
Click on the Prepar3D Academic \ Professional Link to download in full
You need to Extract the Zipped folder Before you complete the update
Use a tool like 7zip to extract the Zipped folder, The 7zip tool will Inform you if your download has not completed successful
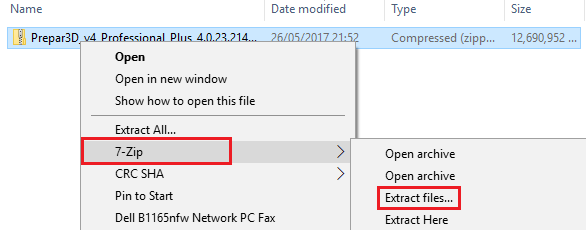
After you Extract the zipped file you will now have the complete Prepar3D v4 application downloaded to your PC
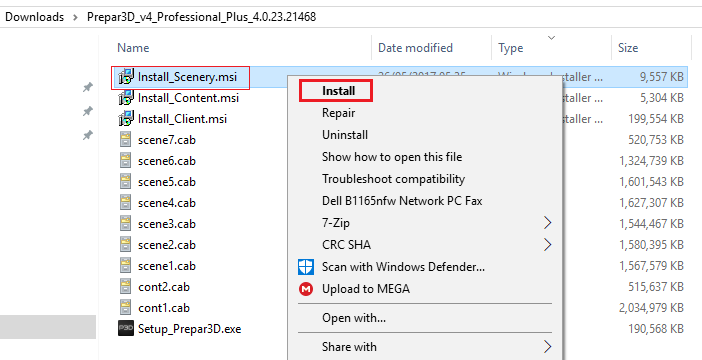
Note: You must first Uninstall the existing Scenery component before you Install the updated Scenery
You can now Install the Scenery component by Right clicking on Install_Scenery.msi click Install
As you now have the full Prepar3D v4 file you can Install any of the component Installers by following the steps in this tutorial
-----------------------------------------------------------------
7) Additional Information
The 3 component Installers Client, Content and Scenery have a total of 18 yellow folders in your core Prepar3D v4 folder.
You can see below as to what folders are removed and updated during the update process
------------------
Install_ Client.msi - Licences, propdefs, Scaleform, ShadersHLSL, trinton
Install_ Content.msi - Scripts, redist, SimObjects, Weather, Scenarios, Ecosystem, Fonts, Autogen, Effects, gauges, Sound, Texture
Install_ Scenery.msi - Scenery
-------------------